

Grand Opening/ Open House Invitations - DIY
Copyright Revelry Invitation Studio, LLC
All Rights Reserved
So we recently created these super cute Grand Opening invitations for Joyful Occasions LLC in Georgia, and I thought they would be the perfect project to share as a freebie DIY invitation for business owners or gals who just want to throw an open house.

Grand Opening/ Open House Invitations - DIY
Copyright Revelry Invitation Studio, LLC
All Rights Reserved
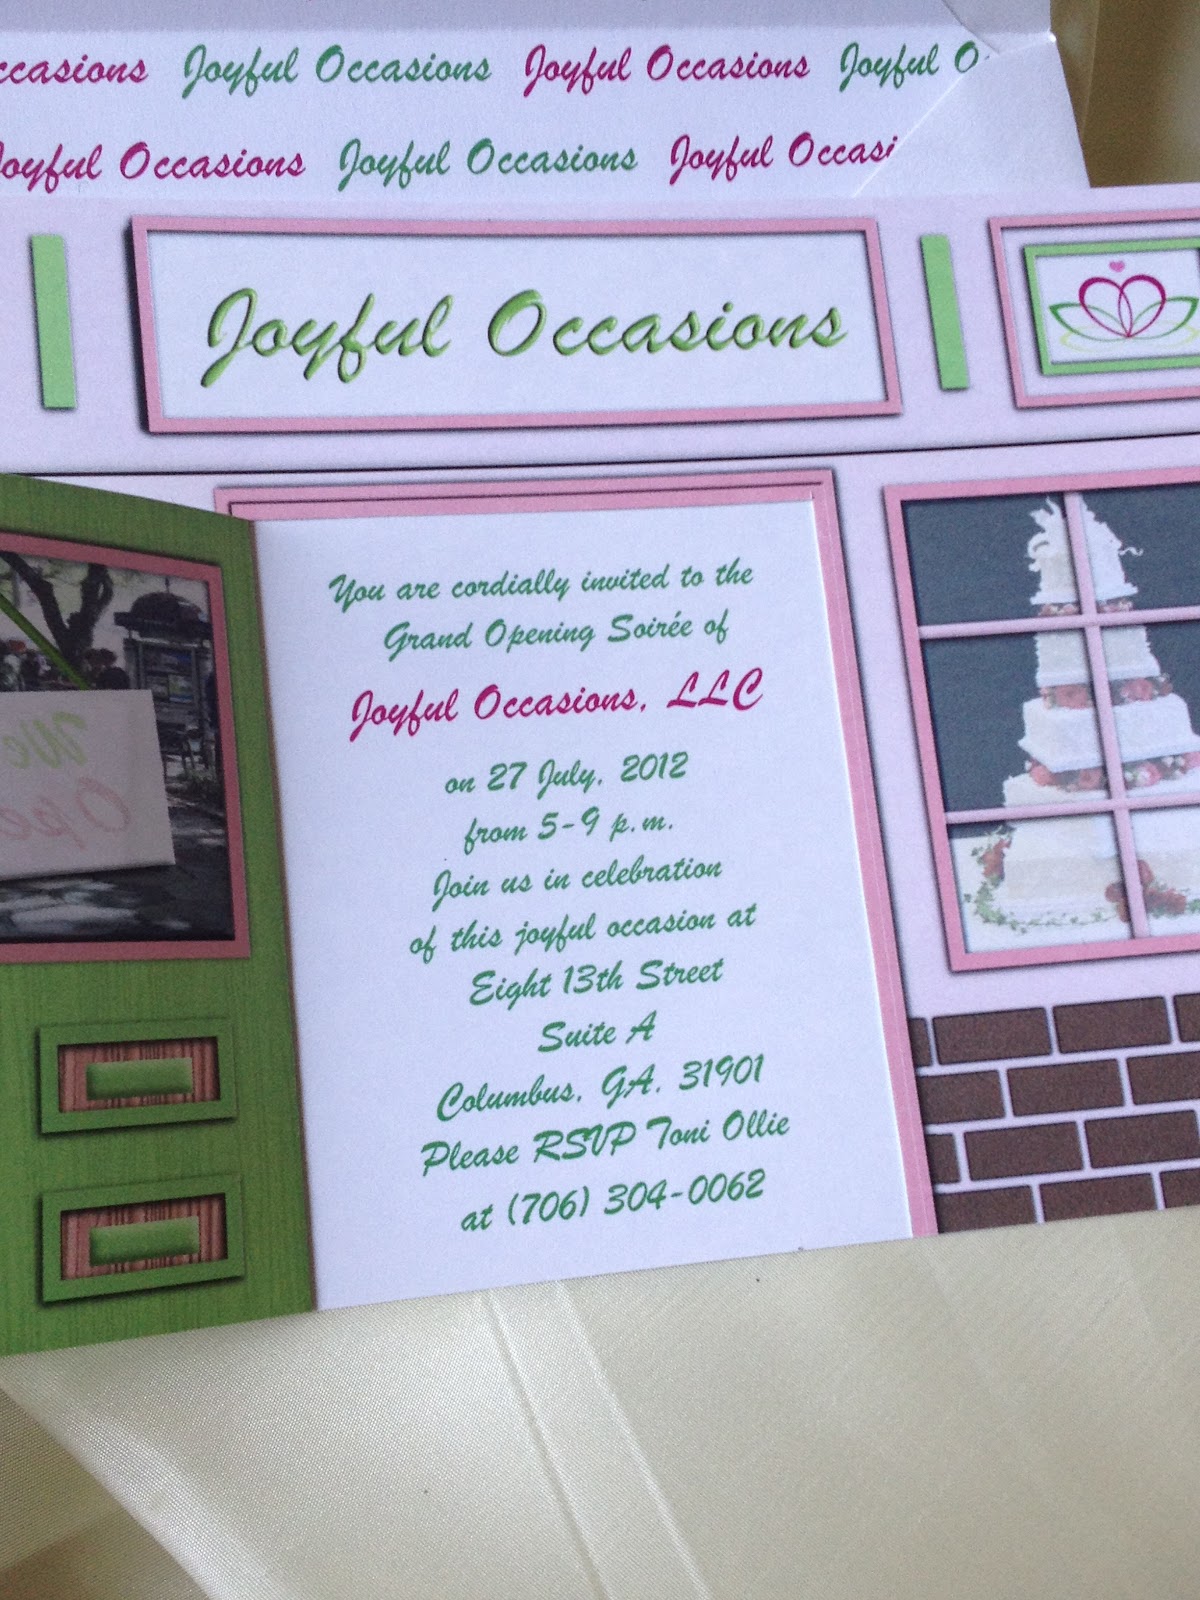
Grand Opening/ Open House Invitations - DIY
Copyright Revelry Invitation Studio, LLC
All Rights Reserved
* We've changed the Store Front sign from "Joyful Occasions" to "Come Celebrate" so you can use it for whatever event you'd like :)
* We've changed the Store Front sign from "Joyful Occasions" to "Come Celebrate" so you can use it for whatever event you'd like :)
First Step: Download the Files
You'll get an exterior, an interior door, and a customizable Word.doc text template
Click the links. On the page that comes up, go to "File" and click "Download". Save to your computer.
Step Two: Print
Print out the exterior using plain white 110# cardstock available at Walmart, Office Max, Staples, etc.
Reinsert the printed pages with the printed side facing down in the paper cartridge (or toward the wall if you have that kind of feed on your printer). You want to take care that the paper is inserted with the top of the graphic to the left (or else your interior door will print upside down.
Print the interior door on the blank side. Double check after one is printed to be sure the door isn't upside down compared to the front. I printed like 40 upside-down... frustrating!
Customize and print your text on another piece of cardstock.
Step Three: Cut Out
This makes a 5.5" x 8.5" invitation. Cut around top, bottom and sides. Then cut the door.
You should be able to carefully cut along the dark line portion of the right-hand side of the door. a tiny overlap onto the pink at the top will allow you to cut the top portion as well, easily.
The left-side pink door jamb and hinges indicate where the door should be scored and folded so it opens nicely. Use a straight-edge and run a screw driver (or if your fancy, a scribe or bone folder will work well too).
Step Four: Adhesive
Place double-sided tape along the edges of the interior of the graphic portion (the side that the interior door is printed). Tape should be as close to the edge as you can get it. Be sure to get around the door cut-out as well.
Step Four: Paste together
Line up the exterior over the text page so the text is centered in the middle of the door opening. Smooth down over the text layer. Cut around edges so you have a two layer invitation that is totally adhered together (i.e. duplex cardstock).
Bam! You're done!
**We will not customize the exterior/interior graphic portions of this invitation without a customization fee (we're reasonable... I promise). If you want to truly make this your own, shoot us an email and we'll discuss how we can customize it for your special event.
~ Happy Weddings!~
No comments:
Post a Comment